
Windows 10 Email Account Setup
Want to setup your email in Outlook? Using Windows Mail?
Click here for Outlook 2007 setup guide
Click here for Outlook 2016 setup guide
Click Here for iPhone and iPad Email setup guide
This procedure can also be used to configure email on your mobile phone.
Use the "Manually Configure" option on your phone's email setup procedure, and
skip to Step 4 below.
Step 1. Click the Start menu button, and click the "Settings"
![]() menu item.
menu item.

Step 2. Click on "Accounts"
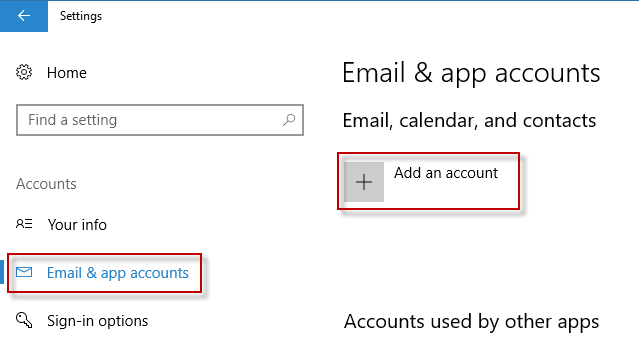
Step 3. Click on "Add an account" under the Email & App Accounts section.
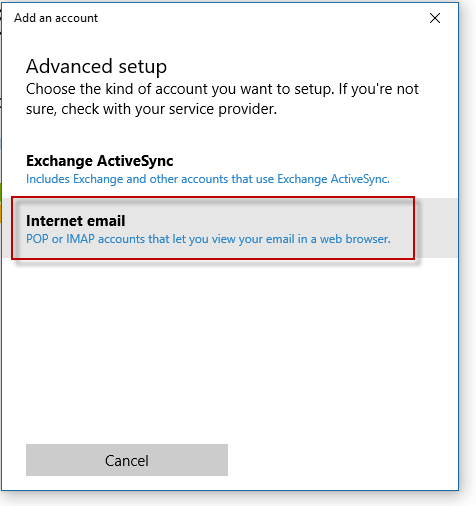
Step 4. Choose "Internet Email".
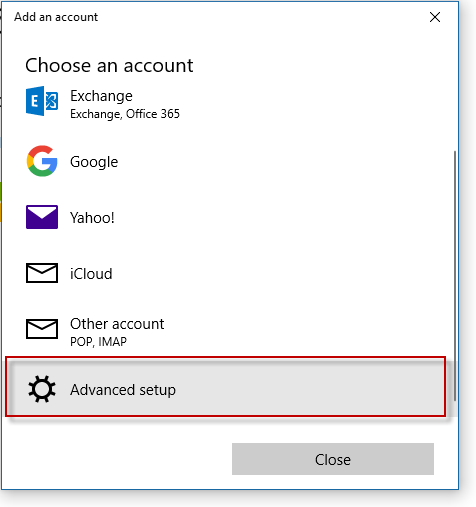
Step 5. Choose "Advanced Setup". You may need to scroll down to see this option.
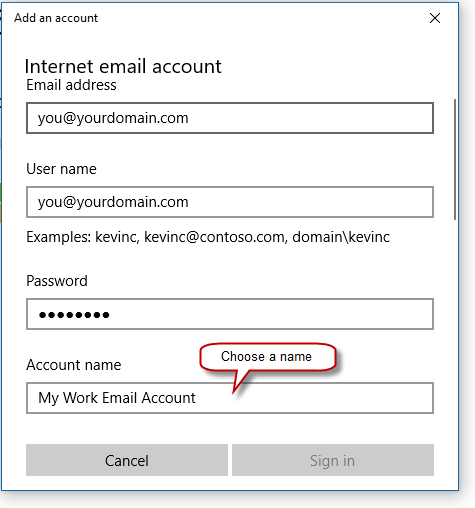
Step 6. Fill in the form as shown below, using your email address and domain name where it says 'yourdomain.com'.
Use your entire email address as the User Name.
Email Address: you@yourdomain.com
User name: you@yourdomain.com
Password: **********
Create an Account Name that you will recognize when using mail, such as "My Work Email Account".
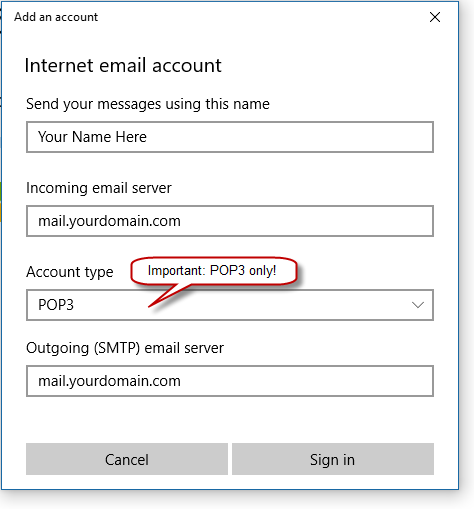
Step 7. Fill in your name as you want your recipients to see it on the 'From' line on your emails, like 'Bob Smith'.
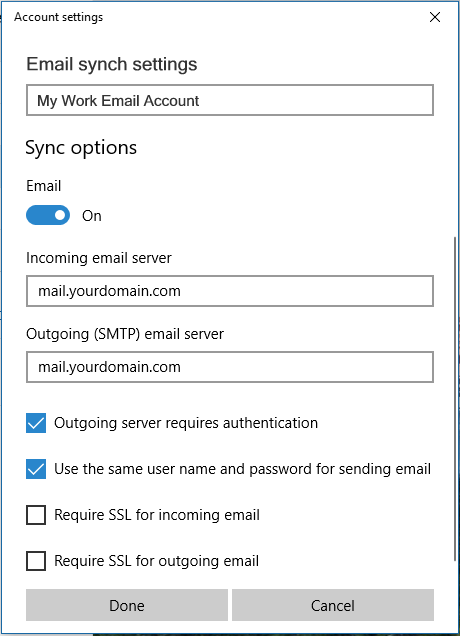
Fill in the incoming and outgoing email servers, using your domain name.
In the Name box, type your full name, like 'Bob Jones'
Both mail servers are the same: mail.yourdomain.com
Choose "POP3" as the Account Type, and scroll down to the next section of the screen:
In the Email Address box, type your full email address.Incoming (POP3) Server: mail.yourdomain.com
Outgoing (SMTP) Server: mail.yourdomain.com
Step 8. Security Options:
2. Use the same user name for sending email: Checked
Do NOT use SSL, or any sort of encryption:
1. Require SSL for incoming email: Unchecked
2. Require SSL for outgoing email: Unchecked
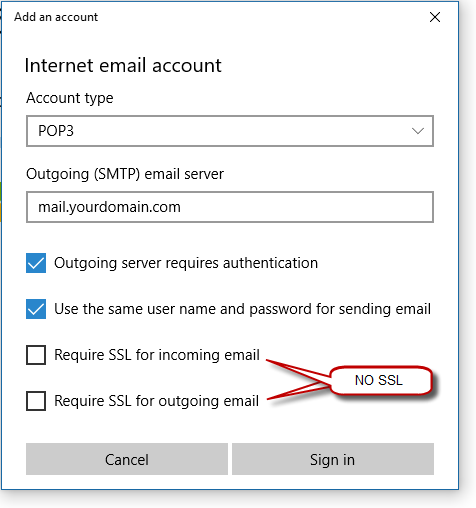
When finished, click "Sign in", and your settings will be validated. If you receive errors, please recheck your settings and try again.
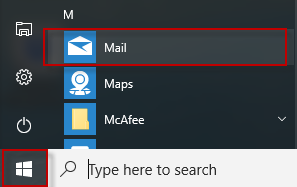
Step 9. Open the Mail application by clicking the Start menu > Mail, and send & receive your messages.
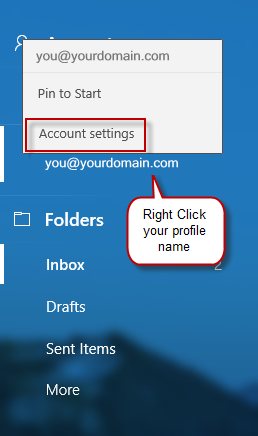
Step 10. Adjust the settings for your account, by right-clicking on the account name in the left hand column of your mail app:
Click "Account Settings"
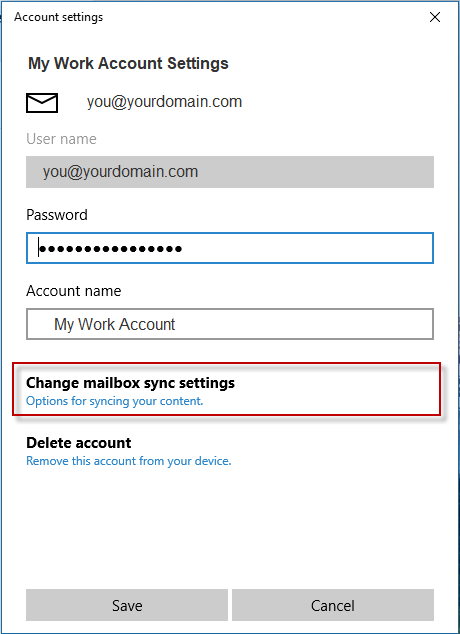
Step 11. Once back to the "Account Settings" screen, click the "Change Mailbox
Synch Settings"
button,
to change the download settings.
Step 12. Change the synch settings to the following:
1. Download new email: every 15 minutes
2. Download email: any time
3. Synch Options: On
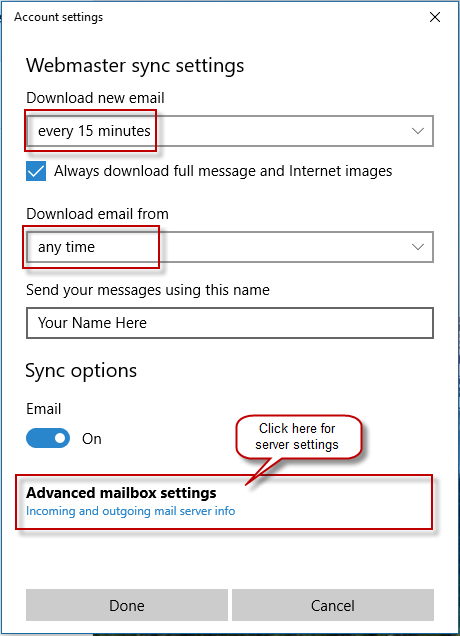
Step 13: you can access the mail server settings by clicking "Advanced Mailbox Settings" in the screen above:
Your setup is complete.
If you are setting up a mobile phone, use the same settings as shown
above,
and make
sure you configure it so the messages you delete from the phone are also deleted from the server.
You will need to manually configure
the mail account
info on your phone, as the automatic
setup wizards on most mobile phones will
not work.
Have a different version of Email? Using Windows Outlook?
Click here for Outlook 2007 setup guide
Click here for Outlook 2016 setup guide
Click Here for iPhone and iPad Email setup guide
Need more assistance? Contact Us or call 253-380-4100.